| ALL ABOUT SHADOW BOXES |
 |
|
Shadow boxes are a unique subset of picture framing. Offering a traditional border combined with a deep "rabbet", they allow the framer or DIY-er to create beautiful displays of three-dimensional objects, decorative edge paper artwork, and even regular photographs. The possibilities are endless when it comes to shadow box picture frames.
This article offers a look at some classic examples of shadow box displays, a how-to guide for home framers, and a detailed selection of KeenART Media's most popular shadow box frame mouldings.
|
SUMMARY
| WHAT IS A SHADOW BOX |
WHAT TO DISPLAY |
STYLE OPTIONS |
HOW-TO |
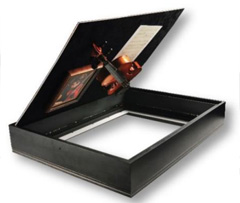
| A display of two or three dimensional objects in a deep picture frame. A shadow box is created by fastening the objects onto a backing board and placing them in the frame behind glass. |
Arrangements of military awards is popular when retiring from service. Shadow boxes are also great for displaying photographs, keepsakes, baptism gowns, and much more. |
At KeenART Media, we have many different shadow box frames that range from 3/4" deep to 2-1/4" deep, with face widths up to 1-1/4". |
This article includes a detailed tutorial that takes you from selecting the perfect frame to hanging your finished shadow box display on the wall of your home. |
|
| WHAT IS A SHADOW BOX
|
|
The term "shadow box" may refer to one of two things:
- A display - usually wall hanging - that shows an arrangement of two- or three-dimensional items behind glass.
- The wood frame used to make a shadow box as described above: a picture frame with a deep rabbet - the space behind the lip of the frame - into which the items can be placed backing board onto which they are affixed, and the clear cover (glazing).
Sort of like a grown-up's diorama, a shadow box offers a protective and contained way to showcase significant mementos on the wall for decades. Though the origin of the shadow box is not definitively known, they may have been developed out of the popularity of stereo-opticans, a mid-1800s three-dimensional viewing device that preceded the View Master, a popular toy of the 1980s and 90s.
It's thought that Victorian women so enjoyed the experience of viewing things in three dimensions, they began creating boxes that would show off special knick-nacks and keepsakes without needing to press the eye to a peep hole. And so, early shadow boxes were born.
Today, there are many picture framers that specialize in creating original shadow boxes using their clients' special items. There are as many ways to design and layout a shadow box as there are things to put into it!
|
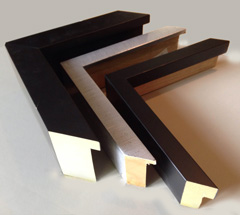
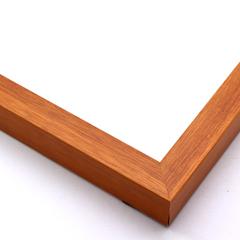
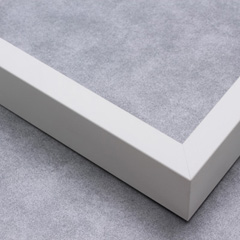
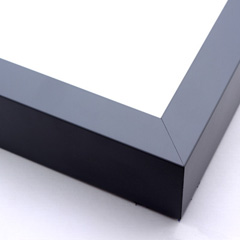
Different shadow box frames
|
| WHAT TO DISPLAY IN A SHADOW BOX
|
|
|
Shadow boxes are often presented to the family of retiring military officers in North America. The shadow box is filled with the retiree's medals and service awards, as well as the badge identifying their final rank. Often a small plaque with their name, and a photograph are also included.
Aside from this popular use, there is a long list of items that can be displayed in shadow boxes:
|
Photographs
Artwork
Awards and metals
Small framed portraits
Plaster casts
|
Dried flowers
Antique china/cutlery
Jewelry
Collectables
Figurines
|
|
Hockey jerseys
Sports memorabilia
Nautical/fishing items
Taxidermy
Autographs
|
Baptism gown
Wedding dress
Wedding bouquet
Ballet shoes
|
Our FrameLight shadow box picture frames are a great way to add some flair to any of the displays listed above. These customizable black boxes can be outfitted with a frame of your choice, and come equipped with a lighting track just behind the frame that highlights your artwork or keepsakes for a beautiful, unique display.
For more information, see our FrameLight Shadow Box information page.
|

Military shadow box
|
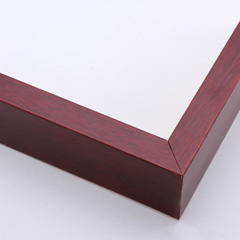
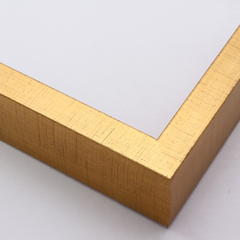
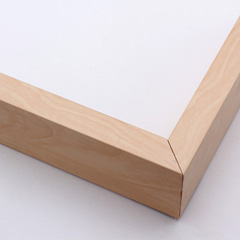
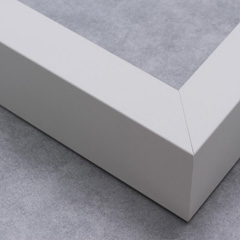
| SHADOW BOX FRAME MOULDINGS
|
|
|
What you are displaying in your shadow box will determine how deep your frame needs to be. For instance, if you are framing a wrinkled photograph taken 100 years ago, you probably only need a depth of about 1". If you're displaying your entire wedding gown, however, you could need as much as 12".
At KeenART Media we have lots of beautiful shadow box frames in many different depths ranging from 7/8" to 2-1/4", the perfect size for paper mementos, small articles of clothing, plaster cast keepsakes of childrens' fingers and toes, and much more.
We also offer a wide range a mounting boards, so it's easy to choose the best one for the weight and size of your items. We supply the high quality acrylic glass, the spacers required to form the gap between glazing and backing, and the hanging hardware for your custom size, custom-made shadow box picture frame.
Below are some examples of our solid wood shadow box mouldings.
|
| HOW TO PUT TOGETHER A SHADOW BOX
|
|
|
Once you have the shadow box frame itself, you can build your beautiful, one-of-a-kind display using a bit of creativity and some basic tools. This brief tutorial takes you from ordering your frame straight to hanging that finished piece up on your wall.
- Figure out the depth you need.
Your shadow box frame must be deep enough to hold not only your items, but the acrylic glazing and backing, while still leaving a bit of space between the item and the clear cover.
To determine the depth of the frame, check the "rabbet" measurement included alongside each of our frames. This is the distance from the back of the frame - directly behind the lip - to the back of the frame's drop edge. The topmost image on the right is an example of the profile images that accompanies each frame listing.
Don't forget that the frame also needs to be able to support the weight of your items. If you are displaying six signed baseballs, for instance, you probably want a thicker frame (a wider face). (Our frames are assembled with a combination of nails, glue, and load-bearing angles, but we cannot be held responsible for frames that break under the weight of extremely heavy contents.)
- Decide if you need spacers.
Frame spacers are used to hold the glazing and backing away from each other so the items can be properly displayed. The spacers are hidden behind the lip of the frame and are usually ordered to match the backing color so they aren't visible from an angle.
Pre-made plastic spacers are available in various sizes (up to about 3/4"), but at KeenART Media, we generally use foam board with an adhesive backing. This allows you to simply stick your spacers in place after you've put the plexiglass into the frame.
If you would like us to provide you with frame spacers, please let us know in the notes section of your order: (1) How much space you need for your items (including the empty space between them and the glazing), and (2) What color spacers you would like (black or white).
- Place your order.
Order your shadow box frame by following the steps on the website. If you are a new customer, you will need to register an account. You will have the option to select a type of backing and one of three styles of acrylic plexiglass.
We strongly recommend you select regular plexiglass for your shadow box. Non-glare plexglass is great for some prints and photos, but if the artwork is not pressed directly against the glazing - as is the case in a shadow box - the items behind may appear blurry. Choose regular plexiglass for the best result.
The style of backing board you require depends on the size and weight of your items. Lightweight items can be affixed to foam board, while you may want to order gatorboard or even aluminium di-bond. Alternately, you may choose to use your own board. In this case, order some foam board for a final layer, or select "none" in that drop-down menu.
- Open your new frame!
Once you have received your order, open the box to make sure you have everything you need. That includes:
- Your frame, of course
- A sheet of plexiglass glazing, covered in blue or brown protective paper
- Your backing (if ordered)
- Adhesive spacers (if ordered)
- Hanging hardware, including hooks, screws, and picture frame wire.
If you're missing anything, let us know right away and we will make it right!
- Set up your items.
Whether you're using backing from KeenART Media, or have provided your own, it is extremely important to make sure your items are attached as securely as possible, and that the backing is strong enough to support the full weight for an extended period of time.
There are many different ways to attach your items to the backing. There are many resources available for guidance in this area. Take a look at this DoItYourself.com article, or this interesting piece from Picture Framing Magazine.
- Assemble the shadow box.
Set the frame face-side down on a clean, soft surface. Carefully remove the protective paper from your sheet of plexiglass and place it in the frame. Use compressed air or gently blow to remove any dust particles. Then insert your spacers so they rest on top of the glazing. Press firmly to adhere them to the sides of the frame.
Carefully turn your backing board with the mounted items upside down. If it feels like anything is not firmly secured, spend some time better attaching the items. Then place the backing board upside-down on top of the spacers.
- Affix the backing and finish the frame.
The back of the board should be level with the back of the frame. If it is slightly lower, use framer's points - forced into the side of the frame - to hold the backing in place. If it is level or slightly higher, drill turn buttons onto the back of the frame so they overlap the backing board.
Depending on the contents or how long you want to keep them in the shadow box, you may choose to apply linen or paper tape over the back of the frame. The tape should cover part of the frame and part of the backing board, so the space between the two is no longer visible.
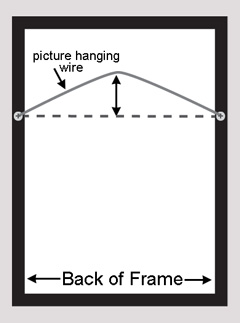
- Attach the hanging hardware.
The hooks with which you were provided will be drilled into the back of the frame 1/4 to 1/3 of the way down from the top. Place them on a slight angle for the loop is over the backing board. Twist the wire securely around each hook, allowing a bit of slack for hanging (see our article How to Tie Wire on Frames). We will do our best to send you the right wire, but always make sure the wire seems able to support the weight of your piece.
Stick the rubber bumpers on the bottom two corners of the frame. Then simply install your wall hook, and you're all set to display your beautiful shadow box!
|
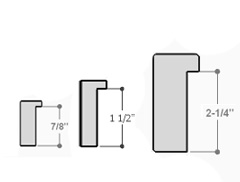
Different rabbet depths
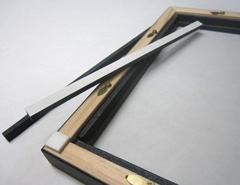
Shadow box with spacers and turn buttons
Order your shadow box frame
Assemble the shadow box
Attach the hangers and wire
|
|
Need some inspiration for your upcoming shadow box project? Check out our Shadow Boxes Pinterest board, where we've collected some great, unique ideas!
If you have questions about the best shadowbox frame selection, putting together your shadow box, or any of our services or products, don't hesitate to contact us. Our knowledgeable staff is always happy to assist with answers, advice, or suggestions.
|
|
© 2002-2024 - KeenART Media Ltd.
|
|
| |
|